Coilovers have become a popular choice among automotive enthusiasts looking to enhance their vehicle’s performance and aesthetics. These adjustable suspension systems offer the perfect blend of comfort and handling by allowing you to customize ride height and stiffness to suit your driving style and conditions. This guide aims to provide you with the essential steps and tips for successfully installing coilovers on your vehicle.
Before diving into the installation process, it’s important to understand what coilovers are and the advantages they provide. Coilovers combine the shock absorber and spring into a single unit, allowing for greater control of suspension dynamics. This setup not only improves handling but also gives you the ability to adjust ride height, which can enhance the overall look of your vehicle. However, proper installation is crucial for achieving optimal performance and safety.
In this DIY guide, we will cover the necessary tools, preparation steps, and installation process for coilovers. Whether you are a seasoned mechanic or a beginner, our easy-to-follow instructions will help you tackle this project with confidence. By the end, you will have a clear understanding of how to install coilovers, ensuring your vehicle benefits from all the performance enhancements they offer.
Choosing the Right Coilovers for Your Vehicle

Selecting the appropriate coilovers for your vehicle is crucial for achieving the desired handling characteristics and performance. Begin by assessing your driving style and the primary purpose of your vehicle, whether it’s for daily driving, track use, or off-road adventures. Each application has different requirements that influence the correct choice of coilovers.
Consider the type of suspension geometry your vehicle has, as compatibility is key. Research the specific coilover models designed for your make and model, ensuring they are engineered to maintain proper alignment and suspension travel. This not only enhances handling but also improves ride comfort.
Next, evaluate the spring rates offered by various coilover kits. A higher spring rate typically results in stiffer suspension, which can provide better handling on smooth surfaces but may compromise comfort on rough roads. Conversely, a lower spring rate yields a softer ride but may negatively affect handling characteristics. Striking the right balance is essential based on your driving needs.
Damping adjustment features are another critical factor. Some coilovers come with adjustable damping settings, allowing you to fine-tune the compression and rebound characteristics. This can significantly influence handling, giving you the flexibility to adapt to different driving conditions or preferences.
Finally, prioritize build quality and materials. High-quality coilovers typically use durable materials that can withstand the rigors of daily use and harsh conditions. Investing in reputable brands with good reviews can ensure longevity and reliable performance, ultimately enhancing your vehicle’s handling capabilities.
Essential Tools and Supplies for Installation
When embarking on the task of installing coilovers on your vehicle, having the right tools and supplies is crucial for a smooth and effective process. Here’s a comprehensive list to ensure you are well-prepared.
First and foremost, gather a socket set. A complete set, including both standard and metric sizes, allows you to easily remove and secure various bolts and nuts. Look for tools made from high-quality materials to prevent stripping and ensure longevity.
A torque wrench is also essential for achieving the proper tightness on your coilover components. This tool ensures that all fasteners are secured to the manufacturer’s specifications, improving handling and safety.
Don’t forget about a quality jack and jack stands. A hydraulic floor jack can make lifting your vehicle much easier, while sturdy jack stands provide stability and safety when working underneath your car.
You’ll need a spring compressor as well, which is vital for safely removing and installing the coil springs on your new coilovers. This tool helps to manage the tension safely, reducing the risk of injury.
Consider having a set of wrenches, particularly adjustable wrenches, for fine-tuning and making quick adjustments to your coilovers once they are installed. These tools are handy when it comes to adjusting ride height and stiffness settings.
A breaker bar can be very useful for loosening stubborn bolts that may have become jammed over time. Coupled with penetrating oil, it can save you a lot of effort and frustration during the installation process.
Lastly, ensure you have basic supplies like rags, a spray bottle of cleaner, and potentially some anti-seize compound to make reassembly easier and maintain mobility over time. Having everything on hand will allow you to focus on the installation and enhance your vehicle’s handling post-installation.
Step-by-Step Guide to Removing Stock Suspensions
Removing stock suspensions is a crucial step before installing coilovers on your vehicle. Follow these steps carefully to ensure a smooth process.
1. Gather Tools and Materials: Before beginning, collect all necessary tools: a jack, jack stands, a socket set, a wrench set, and possibly a spring compressor for certain setups. This will streamline the removal process.
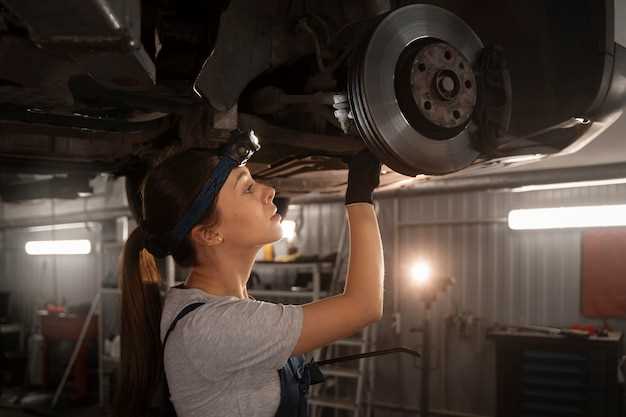
2. Lift Your Vehicle: Using the jack, lift your vehicle off the ground. Make sure to use jack stands for safety. Check that the vehicle is stable before proceeding.
3. Remove the Wheels: Use the appropriate socket to remove the lug nuts from the wheels. Take off the wheels to access the suspension components underneath.
4. Locate Suspension Components: Identify the key components of the stock suspension you need to remove. This typically includes the strut assemblies, control arms, and sway bar links.
5. Disconnect Brake Lines and Sensors: Make sure to detach any brake lines or electronic sensors connected to the stock suspension. Use caution to avoid damaging these components.
6. Remove the Sway Bar Links: Using a wrench and socket, remove the nuts securing the sway bar links to the control arms and sway bar. Set these aside for later use if they are compatible with the new coilovers.
7. Unbolt the Strut Assemblies: Locate the bolts securing the upper and lower sections of the strut assemblies. Remove these bolts using a socket and ratchet, ensuring that you support the strut as you detach it.
8. Remove the Strut Assembly: Carefully pull out the strut assembly from its mount. If necessary, use a spring compressor to safely release the spring tension before proceeding. Ensure you have a firm grip during this step.
9. Remove Lower Control Arms: If you plan on replacing them, unbolt the lower control arms carefully. This may require additional support, as these components are crucial for vehicle alignment.
10. Inspect and Clean: Before installing coilovers, inspect all removed components for wear and damage. Clean the mounting areas to ensure optimal fit and function for the new suspension setup.
Once the stock suspensions are removed, you are ready to proceed with the coilover installation. Having a clean workspace and organized components will aid in the transition to your new suspension system.
Installing Coilovers: Key Steps to Follow

Installing coilovers on your vehicle can significantly enhance handling and adjustability, allowing you to tailor your ride to your preferences. Follow these key steps to ensure a successful installation.
-
Gather Necessary Tools and Materials:
- Coilover kit specific to your vehicle
- Socket set and wrenches
- Torque wrench
- Spring compressor (if needed)
- Jack and jack stands
- Pliers and screwdrivers
- Safety glasses and gloves
-
Prepare the Vehicle:
- Park on a flat surface.
- Loosen the wheel lug nuts slightly.
- Raise the vehicle using a jack and secure it with jack stands.
- Remove the wheels to access the suspension components.
-
Remove Old Suspension Components:
- Disconnect the sway bar links.
- Remove any shock absorber bolts.
- Take out the old spring assemblies carefully.
-
Install the Coilovers:
- Place the coilover assembly into the strut mount.
- Secure it with bolts, ensuring they are properly torqued.
- Reconnect the sway bar links if removed.
-
Adjust Height and Damping Settings:
- Set the desired ride height according to your preference.
- Adjust damping settings based on driving style (if applicable).
-
Reassemble and Test:
- Reattach the wheels and tighten the lug nuts in a star pattern.
- Lower the vehicle back to the ground.
- Take the car for a test drive to check the handling.
Following these steps will help ensure that your coilovers are installed correctly, providing you with improved ride quality and handling tailored to your driving needs.
Tuning Your Coilovers for Optimal Handling
Coilovers are an essential component in achieving superior handling for your vehicle. Proper tuning of your coilovers can significantly improve ride quality, cornering stability, and overall performance. Here’s how to tune your coilovers effectively:
-
Adjust Ride Height:
Start by setting your ride height. This should be adjusted to suit your driving style and intended use of the vehicle. Here are some key points to consider:
- A lower ride height can increase handling by lowering the center of gravity.
- Be mindful of suspension travel; too low can lead to bottoming out.
- Ensure that your alignment settings are adjusted after changing ride height.
-
Set Damping Settings:
Damping affects how quickly your suspension reacts to bumps and road imperfections. Proper damping can enhance handling considerably:
- Start with the manufacturer’s recommended settings.
- Adjust the rebound and compression settings depending on your driving conditions.
- Testing different settings on various road types can help find the optimal balance.
-
Spring Rates:
Choosing the right spring rates is crucial for handling. Here’s how to select the appropriate rates:
- Consider your vehicle’s weight distribution and intended use (track, street, etc.).
- Stiffer springs may provide better handling but can sacrifice comfort.
- Consult with professionals or forums specific to your vehicle for recommendations.
-
Corner Weighting:
This technique ensures that each corner of your car has the optimal load, improving handling dynamics:
- Adjust the coilovers to achieve balanced weight distribution across all four corners.
- Utilize scales to accurately measure corner weights.
- Make incremental adjustments and retest to fine-tune the handling.
-
Regular Maintenance:
Maintaining your coilovers is essential for consistent handling performance:
- Inspect for leaks, wear, or damage periodically.
- Rebuild or replace worn components as necessary.
- Keep adjustment knobs clean and functioning smoothly.
By carefully tuning your coilovers, you can achieve optimal handling that enhances your overall driving experience. Regular testing and adjustments will ensure that your vehicle remains responsive and enjoyable on the road or track.
Common Mistakes to Avoid During Installation
Installing coilovers can significantly enhance your vehicle’s handling and ride quality, but improper installation can lead to performance issues or damage. Here are some common mistakes to avoid:
| Mistake | Description |
|---|---|
| Neglecting to Read Instructions | Each coilover kit comes with specific installation instructions. Skipping this step may result in incorrect installation. |
| Using the Wrong Tools | Not having the correct tools can complicate the installation process and may lead to stripped bolts or damaged components. |
| Improper Adjustment Settings | Failing to set the ride height and damping settings properly can affect handling and ride comfort adversely. |
| Over-tightening Bolts | Applying excessive torque can damage threads and lead to stress fractures in suspension components. |
| Ignoring Pre-load Adjustments | Not setting the correct pre-load on the coil springs can result in poor handling characteristics and premature wear. |
| Overlooking Alignment | Failing to align your vehicle post-installation can cause uneven tire wear and suboptimal driving dynamics. |
By being mindful of these common mistakes, you can ensure a successful coilover installation that enhances your vehicle’s performance without compromising safety or integrity.


