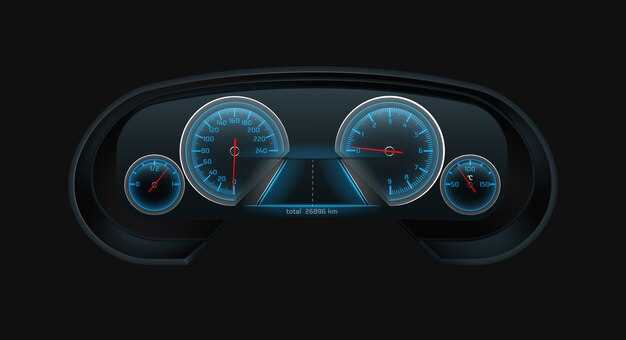
In the world of motorsports, having the right tools can make a significant difference in performance and safety. One such essential tool is a digital display, which provides real-time information about your vehicle’s performance metrics. By integrating a digital dash into your race car, you gain the ability to monitor crucial data such as speed, RPM, fuel levels, and engine temperature, all at a glance. This guide will walk you through the steps necessary for a successful installation of a digital dash, ensuring that you stay informed and in control on the track.
In recent years, the popularity of digital displays has surged due to their clarity and versatility. Unlike traditional analog gauges, digital dashes can be customized to show a variety of data points, allowing for a more tailored racing experience. Additionally, many digital displays offer features such as alarms and warnings for critical parameters, enhancing the safety of both the driver and the vehicle. This article will provide you with detailed instructions, tips, and best practices for installing a digital dash, ensuring that you make the most out of this innovative technology.
Choosing the Right Digital Dash for Your Race Car
Selecting the appropriate digital dash for your race car is crucial for optimizing your performance on the track. A digital dash provides real-time data and a clear display of key metrics, allowing drivers to make informed decisions during a race. Here are some essential factors to consider when making your choice:
- Compatibility: Ensure the digital dash is compatible with your car’s existing sensors and ECU. Check the specifications to avoid integration issues.
- Display Quality: Look for a display that provides high visibility in various lighting conditions. Consider options with adjustable brightness and anti-glare features.
- Data Displayed: Determine which metrics are most important for your racing style. Common data points include speed, RPM, water temperature, oil pressure, and lap times. Choose a dash that can display all critical information efficiently.
- Customization: A customizable display allows you to configure the layout and colors according to your preference. This feature can enhance readability and focus during races.
- Data Logging: Some digital dashes come equipped with data logging capabilities, enabling you to review your performance after races. This can be invaluable for continual improvement.
- Durability: Race environments can be harsh. Opt for a dash that is built to withstand vibrations, temperature changes, and potential impacts.
- Ease of Installation: Consider how easily the dash can be installed in your vehicle. Some units come with plug-and-play capabilities, while others may require more extensive wiring.
- Price and Support: Evaluate your budget and weigh the features against the cost. Additionally, check for manufacturer support and warranty options for peace of mind.
By carefully assessing these factors, you can select a digital dash that enhances your race car’s performance and boosts your confidence behind the wheel.
Tools and Equipment Needed for Installation
Installing a digital dash in your race car requires specific tools and equipment to ensure a successful and efficient process. Below is a comprehensive list of the essentials you’ll need:
1. Basic Hand Tools: A set of standard hand tools will be crucial for the installation. This includes a socket set, wrenches, and screwdrivers. These tools will help you remove the existing dash and secure the new digital dash in place.
2. Wiring Tools: Since a digital dash relies heavily on electronics, appropriate wiring tools are necessary. You’ll need a wire stripper, crimping tool, and multi-meter to handle the electrical connections properly. Ensuring solid connections will prevent any future electrical issues.
3. Drill and Drill Bits: Depending on your race car’s interior and the digital dash model, you may need to drill new mounting holes. A power drill and a variety of drill bits suitable for metal or plastic are essential for this part of the installation.
4. Zip Ties and Electrical Tape: To manage excess wiring and ensure safety, having zip ties on hand is advisable. Electrical tape will help insulate and secure any exposed connections, providing additional protection against vibrations during races.
5. Mounting Brackets: Make sure to acquire suitable mounting brackets that are compatible with your digital dash model. These brackets will provide the necessary support to keep the dash securely in place during high-speed maneuvers.
6. Installation Manual: Having a user manual specific to your digital dash model can be invaluable. It will provide detailed steps on wiring, calibration, and troubleshooting, ensuring you adhere to the manufacturer’s specifications.
Equipping yourself with the right tools and equipment will facilitate a smooth installation process, allowing you to focus on performance enhancements and race preparation.
Wiring and Connecting Your Digital Dash
Proper wiring and connection are crucial for ensuring your digital dashboard functions correctly and provides accurate display data. Start by consulting the manufacturer’s wiring diagram, which will outline the required connections for power, ground, and signal inputs.
Begin with the power supply. Most digital dashes require a 12V power source. Identify a suitable location on the fuse panel or use an auxiliary switch if necessary. Always use a fuse to protect the system from overload. Connect the positive wire to the power source and the negative wire to a solid ground point on the chassis to prevent any interference or voltage drops.
Next, connect the data input wires. Depending on the setup, your digital dash may need to receive signals from sensors such as the speedometer, tachometer, oil pressure, and temperature sensors. Make sure to use high-quality wire and connectors for these inputs to minimize resistance and signal loss.
Once all wiring is complete, double-check each connection. Ensuring every wire is securely fastened and correctly routed reduces the risk of shorts or failures during a race. It’s also advisable to use heat-shrink tubing or electrical tape on connections for added protection against vibrations and moisture.
After wiring, mount your digital dash securely in the cockpit. Position it where it can be easily viewed while driving. Once mounted, power up the system and perform a standard calibration to ensure all gauges and displays are accurate. Follow the specific calibration instructions provided by the manufacturer to configure your digital dash correctly.
After confirming all readings are accurate, tidy up any excess wiring using zip ties or cable organizers to keep the cockpit neat and prevent snagging during operation. Proper wiring and connection will enhance the reliability of your digital display and improve your racing experience.
Calibrating Sensors for Accurate Data Display

Proper calibration of sensors is crucial for ensuring that your digital dash presents accurate and reliable data. Each sensor in your race car plays a vital role in collecting information such as speed, RPM, temperature, and pressure, which are displayed on the dash. Without precise calibration, the data shown may be misleading, potentially affecting your race performance and decision-making.
The first step in calibration involves understanding the specifications of each sensor. Consult the manufacturer’s guidelines to determine the expected output range. This information is essential for setting the correct parameters in your digital dash. Each type of sensor might require a different approach to calibration, so take the time to familiarize yourself with each unit’s requirements.
Next, perform a physical installation of the sensors according to the manufacturer’s instructions. Ensure that each sensor is positioned correctly and securely, as improper installation can lead to inaccurate readings. Once installed, connect the sensors to your digital dash and access the calibration settings within the dash’s software interface.
Calibration typically involves inputting known values for each sensor. For instance, if you are calibrating a temperature sensor, you may need to compare its readings against a reliable thermometer at various temperature points. Adjust the offset and scaling settings in your digital dash until the displayed values match the true recorded temperatures.
Testing the accuracy of your calibrated sensors is paramount. Conduct a series of laps or runs in a controlled environment to verify the data being displayed on your digital dash. Make note of any discrepancies and repeat the calibration process if necessary. It may require several iterations to achieve the level of accuracy needed for racing conditions.
Regular maintenance and re-calibration are also important as you log more miles. Factors such as temperature changes, vibrations, and wear can impact sensor performance over time. Establish a routine check-up for your sensors to ensure continued accuracy and reliability as you compete on the track.
By carefully calibrating your sensors, you can ensure that your digital dash provides the most accurate data available. This precision allows for better strategy decisions and can significantly enhance your overall racing experience.
Integrating the Digital Dash with Existing Systems

Integrating a digital dash into your race car involves ensuring compatibility with existing systems, such as the engine control unit (ECU), sensors, and data logging systems. One of the first steps is to assess the output signals from the current sensors; these signals must match the requirements of your new digital display. Common protocols like CAN bus, RS232, or analog signals should be evaluated for compatibility.
Next, focus on wiring. A proper wiring harness may be necessary to facilitate connections between the digital dash and the existing components. This ensures reliable signal transmission and minimizes interference. Additionally, ensure that the power supply for the digital display is stable, as fluctuations can affect performance and readability.
Software integration is another critical aspect. Most digital dashes come with configuration software that allows you to customize display settings and data interpretation. It’s vital to calibrate the digital display to reflect accurate readings from your existing systems. This might involve inputting specific parameters such as tire pressure, oil temperature, or lap times, which are crucial for race performance.
Don’t overlook the importance of mounting. The placement of the digital dash should provide optimal visibility while maintaining accessibility for any adjustments. This enhances driver focus and minimizes distractions during races.
Lastly, testing is essential. Once integrated, verify that the digital display accurately reflects data from the existing systems. Conduct on-track testing to assess performance and make any necessary adjustments to ensure that all systems work harmoniously together. Proper integration leads to a seamless racing experience, enhancing both functionality and competitiveness on the track.
Troubleshooting Common Installation Issues
Installing a digital dash can enhance your racing experience, but you may encounter some common issues during the setup process. Here are solutions to help you overcome these challenges.
1. No Power to the Display
If your display is not powering on, check all power connections. Make sure the wiring harness is securely connected to both the dash and the vehicle’s power source. Test the power supply with a multimeter to ensure it provides the required voltage.
2. Incorrectly Configured Settings
Sometimes the dash may not function as expected due to incorrect configurations. Ensure that the settings match your vehicle’s specifications. Refer to the user manual to verify that parameters such as engine type, sensor inputs, and display preferences are set correctly.
3. Unresponsive Touch Screen
If the touch screen display is unresponsive, check for physical obstructions or debris on the surface. A reset may resolve the issue; consult your manual for instructions on how to perform a reset. If the problem persists, consider updating the firmware or contacting customer support.
4. Inaccurate Readings
Inaccurate readings on the digital dash can stem from improperly calibrated sensors. Verify that all sensors are functioning correctly and are properly connected. Calibration procedures typically found in the manual should be followed closely to ensure accurate data.
5. Connectivity Issues
For displays that interface with external devices, such as GPS or telemetry systems, connectivity problems can arise. Check wiring and ensure that all connections are secure. Software updates or driver installation may be necessary to facilitate communication between devices.
6. Issues with Backlighting
Dim or flickering backlighting can affect visibility. First, inspect the power connections to the dash. If secure, check settings related to brightness and contrast in the display menu. Replace bulbs or check internal circuitry if backlighting remains an issue.
By following these troubleshooting tips, you can effectively address most common installation issues encountered with your digital dash. Regular maintenance and careful setup will ensure optimal performance on the track.


